How to repair failed China road joint filling?
Leave a message

Hey there! As a supplier of China road joint filling materials and equipment, I've seen my fair share of failed road joint fillings. It's a common issue that can lead to all sorts of problems, from water damage to structural issues. But don't worry, I'm here to share some tips on how to repair those failed joints and get your roads back in top shape.
Understanding the Causes of Failed Road Joint Filling
Before we dive into the repair process, it's important to understand why road joint fillings fail in the first place. There are several factors that can contribute to joint filling failure, including:
- Weather Conditions: Extreme temperatures, moisture, and UV exposure can all cause the joint filling material to deteriorate over time. For example, in areas with cold winters, the expansion and contraction of the road surface due to freezing and thawing can put stress on the joint filling, causing it to crack or pull away.
- Traffic Load: Heavy traffic can also take a toll on road joint fillings. The constant pressure and movement of vehicles can cause the joint filling to wear down, leading to gaps and cracks.
- Poor Installation: If the joint filling is not installed correctly, it may not adhere properly to the road surface or may not be able to withstand the stresses of traffic and weather. This can result in premature failure.
- Material Quality: The quality of the joint filling material itself can also play a role in its performance. Low-quality materials may not have the necessary durability or flexibility to withstand the demands of the road environment.
Assessing the Damage
Once you've identified the cause of the failed joint filling, the next step is to assess the extent of the damage. This will help you determine the best repair method and the amount of materials and equipment you'll need.
- Visual Inspection: Start by visually inspecting the joint to look for signs of damage, such as cracks, gaps, or separation from the road surface. Pay attention to the size and location of the damage, as well as any other factors that may affect the repair process.
- Testing: In some cases, you may need to perform additional testing to determine the condition of the joint filling and the underlying road surface. This could include using a moisture meter to check for water infiltration or a hardness tester to assess the strength of the joint filling material.
Choosing the Right Repair Method
There are several different methods for repairing failed road joint fillings, each with its own advantages and disadvantages. The method you choose will depend on the type and extent of the damage, as well as the specific requirements of the road.
- Replacement: If the joint filling is severely damaged or has completely failed, the best option may be to replace it. This involves removing the old joint filling and installing a new one. To do this, you'll need to use a joint cutter to remove the existing filling and then clean the joint thoroughly before applying the new material.
- Sealing: For minor cracks and gaps, sealing the joint may be sufficient. This involves applying a sealant to the joint to prevent water and debris from entering and to restore the integrity of the joint. There are several different types of sealants available, including silicone, polyurethane, and asphalt-based sealants.
- Grouting: In some cases, grouting may be used to repair failed road joint fillings. This involves injecting a grout material into the joint to fill the gaps and cracks and to provide additional support. Grouting can be an effective way to repair joints that have been damaged by water infiltration or structural issues.
Using the Right Equipment
To ensure a successful repair, it's important to use the right equipment for the job. Here are some of the tools and equipment you may need:
- Joint Cutter: A joint cutter is used to remove the old joint filling and prepare the joint for the new material. There are several different types of joint cutters available, including handheld and walk-behind models.
- Cleaning Equipment: Before applying the new joint filling or sealant, it's important to clean the joint thoroughly to remove any dirt, debris, or old material. This can be done using a pressure washer, a wire brush, or a vacuum cleaner.
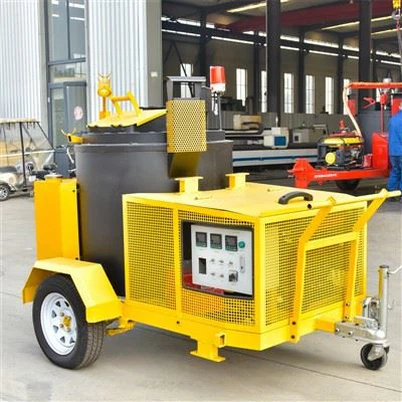
- Application Equipment: Depending on the type of repair method you choose, you may need to use different application equipment. For example, if you're applying a sealant, you'll need a caulking gun or a sprayer. If you're grouting the joint, you'll need a Traction Grouting Machine or a Concrete Grouting Machine.
Preparing the Joint
Before applying the new joint filling or sealant, it's important to prepare the joint properly to ensure a good bond and a long-lasting repair. Here are some steps you can take to prepare the joint:
- Clean the Joint: As mentioned earlier, cleaning the joint is essential to remove any dirt, debris, or old material. Use a pressure washer, a wire brush, or a vacuum cleaner to clean the joint thoroughly.
- Dry the Joint: Make sure the joint is completely dry before applying the new material. This will help the material adhere properly and prevent water from getting trapped in the joint.
- Apply a Primer: In some cases, it may be necessary to apply a primer to the joint before applying the new joint filling or sealant. A primer can help improve the adhesion of the material and provide additional protection against water and chemicals.
Applying the New Joint Filling or Sealant
Once the joint is prepared, it's time to apply the new joint filling or sealant. Here are some tips to help you apply the material correctly:
- Follow the Manufacturer's Instructions: Make sure you read and follow the manufacturer's instructions carefully when applying the new material. This will ensure that you use the correct amount of material and apply it in the right way.
- Use the Right Tools: As mentioned earlier, using the right tools is essential for a successful repair. Make sure you have the appropriate application equipment and that it's in good working condition.
- Apply the Material Evenly: When applying the joint filling or sealant, make sure you apply it evenly to the joint. This will help ensure a good bond and a long-lasting repair.
- Allow the Material to Cure: After applying the new material, allow it to cure according to the manufacturer's instructions. This may take several hours or even days, depending on the type of material and the weather conditions.
Maintaining the Repaired Joint
Once the joint has been repaired, it's important to maintain it properly to ensure its long-term performance. Here are some tips to help you maintain the repaired joint:
- Keep the Joint Clean: Regularly clean the joint to remove any dirt, debris, or other contaminants. This will help prevent damage to the joint and ensure its longevity.
- Inspect the Joint Regularly: Periodically inspect the joint to look for signs of damage or wear. If you notice any issues, address them promptly to prevent further damage.
- Avoid Heavy Traffic: If possible, avoid driving heavy vehicles over the repaired joint for a period of time after the repair. This will allow the material to fully cure and reduce the risk of damage.
Conclusion
Repairing failed road joint fillings is an important part of maintaining the safety and integrity of our roads. By understanding the causes of joint filling failure, assessing the damage, choosing the right repair method, using the right equipment, and following the proper procedures, you can ensure a successful repair and a long-lasting solution.


If you're in need of road joint filling materials or equipment, or if you have any questions about the repair process, please don't hesitate to contact us. We're a leading supplier of China road joint filling products and have the expertise and experience to help you with your project. Whether you need a Traction Grouting Machine, an HJ100A Hand Pushed Seam Sealing Machine, or a Concrete Grouting Machine, we've got you covered.
Let's work together to keep our roads in top shape!
References
- "Guide to Road Joint Filling and Sealing." Federal Highway Administration.
- "Best Practices for Road Joint Repair." American Association of State Highway and Transportation Officials.
- "Maintenance and Repair of Road Joints." International Society for Asphalt Pavements.